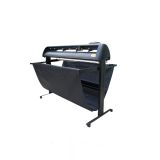
48" Foison Vinyl Cutter Plotter
Item Code: CPM-FS-C48
This 48 inch (1200mm) vinyl cutting plotter is designed for cutting all kinds of self-adhesive pictures and letters as well as stickers. It is made in China with optical sensor that allows contour cut, and two years warranty is provided. Application This cutting plotter will be useful for your business; it is designed for both home and office use. This vinyl cutting plotter will make your work easier and faster in making any kind of design. It can cut vinyl decal, sticker, masking film for painting or etching, vinyl lettering, decorative scrapbooking papers, card stock, stencils, magnetic sheet, stickers for signage, sign glass decals, penaflex, etc. As well as all kinds of T-shirt heat transfer media like: flex, flock, Magi cut colored paper for garments, etc. Product Features Adopts high-precision steel axes, can prevent slipping while cutting long materials Ultra pressure, capable of punching thick engineering materials 10 silica gel buttons, easy-to-use and durable 4*8 high resolution LCD back light display, suitable for different work surroundings High Speed Arithmetic Microprocessor, stable processing, low noise operation yet without zigzag while cutting User-friendly Design, allows to adjust cutting force and working speed while Support Windows 2000/xp2/Vista 32 bits system USB interface to connection computer also support hot-plug Machine Detailed Pictures 1. Adjust the protruding length of the knife top as required for specific cutting media. 2. The LCD shows 3. Original point setting 4. Blade cutter and holder 3 pcs of blade cutters Blade holder 5. Installation of stand Some Tips ◆ Before cutting contour: a. You must set the distance of blade base and right side plate more than 4cm. b. Let the knife point in the bottom right corner of the fist mark point after input the correct offset. ◆ You only need to adjust the offset once and record it, if you change the computer, write the record offset value to the new computer, it is ok. ◆ For the small size (e.g.: A4 size) cutting, you can choose two mark points, for the big size cutting, you can choose 4 mark points to increase the precision. ◆ Flexi software can adjust the outline and the graphics distance, please view the details in the video.
![]() Ships to United States
Ships to United States
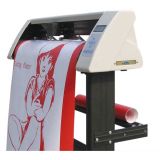
66" Redsail Vinyl Cutter Plotter with Contour Cut Function
Item Code: CPM-RS-1780C
Description: This 66 inch large format plotter has a contour cutting function and is used for education, garment CAD plotting and other industry purposes. It is made in China and comes with one year warranty. Product Highlights: - Low cost and high performance sign making machines. - Controlled by RISC high speed processor, high speed cache. - Unique soft impact cutter for smooth cutting. - This large format plotter adopts the latest numerical technology: it regulates the pressure and speed in real-time numerically. This is very convenient and fast. - It has a perfect output, there's no saw tooth even when using high speed. - It supports Corel draw file. This brings great convenience to your work. - The large format plotter is highly stable and has nearly no malfunction. - The large format plotter has a nice appearance and very solid support to avoid wobbling while cutting. - The large format plotter has very accurate and simple LCD with English Menu, operated by pressing buttons. . - The plotter’s pinch rollers are adjustable, so the paper stays in place when using rolls of media. With this function, you can use the plotter to make materials for large light boxes. - This large format plotter is equipped with Texas 32 Bit DSP processor and look-ahead algorithm to obtain a fast plotting speed. - This large format plotter uses a cheap ball-pen to plot thus this consumable price is low. - Unique vacuum adsorption system to ensure smooth plotting. Applications: This large format plotter can be used to cut all kinds of pictures, letters on self-adhesive vinyl, stickers for signage, glass sign decals, penaflex, fabrics and leather, decal vinyl, masking film for painting or etching, vinyl lettering, decorative scrapbooking papers, card stock, stencils, magnetic sheet. As well as all kinds of T-shirt heat transfer media like flex, flock, Magi Cut colored paper for garments, etc.
![]() Ships to United States
Ships to United States
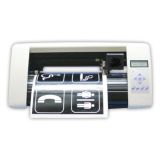
16" Redsail Mini Vinyl Cutter Plotter with Contour Cut Function
Item Code: CPM-RS-500C
Red optic sensor, register marks with "Cut" Support, cut plug-in for Corel DRAW. Red optic sensor, register marks with "Cut" Support, cut plug-in for Corel DRAW. Aluminum alloy knurling feed rollers, leading shaft, high torque motor and micro-step driver locating system. With such a fast, accurate and versatile desktop cutting plotter, you can contour cut most any media pre-printed - from your choice of inkjet, solvent based and laser printer. WinPCSign plotting software (Match training CD) Support CorelDraw output directly (But you need to buy a soft dog) Features: - Low cost and high performance machine for the manufacture of signaling. - Controlled by RISC high - speed processor, a high speed cache. - Unique soft impact cutter for smooth cutting. - It can regulate the pressure and speed numerically at real-time, which is very convenient and can be achieved fast. - It has a perfect output: There’s no saw tooth even when using high speed. - It supports direct cut-outs from `CorelDraw` 11, 12, X3.X4, X5, bringing great convenience to work. - It has a stylish design and very solid support. It doesn't shake while cutting. - The cutting plotter has LCD with a very accurate and simple English Menu, operated it by pressing buttons. - The plotter’s pinch rollers are adjustable, so the paper stays in place when using rolls of media. Components: 1. Protection of track 9. Knife holder 2. Carriage 10. Seat of knife holder 3. Pinch roller 11. Left shell 4. LCD monitor 12. Handle to control the roller 5. Keyboard panel 13. AC power port 6. LED lamp 14. Safe fuse 7. Right shell 15. Power switch 8. Machine’s foot 16. RS232 port Locknut holder's shell close screw blade On the working state, the knife can rotate in holder very smoothly. In the first time you can screw the "close screw" off the "holder's shell", set the blade into bottom of holder, then close the "close screw" to avoid the knife falling out, let the knife peep out of the holder less than 0.5mm. When you want to change the blade, take out the old blade, change a new one, then close the" close screw", keep the blade peep out of the holder less than 0.5mm. (The locknut will not screw, usually). Close screw Holder shell Plotting pen. You can use usual ball pen as plotting pen; keep the ball pen peep out of the holder between 4mm and 5mm. the other using method is similar as blade's process; please try it yourself according to the blade's changing method. Details Pictures: Silica gel pinch roller, durable in use USB interface Double spring press paper holder, not distortion CE mark and power supply This cutting plotter is great for business usage; it is able to make any kind of design and it works faster and easier than other models. This machine can be used for stickers, glass decal, penaflex, vinyl decal, masking film for painting or etching, vinyl lettering, decorative scrapbook papers, card stock, stencils, magnetic sheets, etc. As well as all kinds of flexible heat transfer media like T - shirts, magic cut colored paper for garments, etc. Blade holder and pen holder The life of Blade: The correct usage could prolong the life of blade. (1) The more length the blade sharp extends out, the shorter life blade will work. So you should avoid cut through the paper. (2) The more Force, the blade life will get short. (3) Trying to use small Force, when the blade edge is getting less sharp, you could add the working force suitable. (4) Different brand blades will have different life. (5) You should change the blade when you find the old one has no tartness, to avoid affecting the work badly. How to fix and setup the blade? Turn off the plotter power. Set the holder on holder's seat; close the screw of seat of holder. Turn on the power, the carriage will move to right side; you can press "TEST" key to examine the plotter. Remark: A. You should keep the blade clean and don’t break the blade sharp. B. The length out of the cover should be just a little bit, say 0.2mm around over the paper thickness which you will cut! On the working state, the knife can rotate in holder very smoothly. In the first time you can screw the "close screw" off the "holder's shell", set the blade into bottom of holder, then close the "close screw" to avoid the knife falling out, let the knife peep out of the holder less than 0.5mm. When you want to change the blade, take out the old blade, change a new one, then close the" close screw", keep the blade peep out of the holder less than 0.5mm. (The locknut will not screw, usually). How to load media? Steps: Load media / Load paper: When you move the roller, you must lift the handle first; the right roller will not move, usually. Lift the handle, the roller will lift 1 - 2mm, and then you can load your media. Laying down the handle, you can press "UP" key (S+) or "DOWN" key (S-) continuously, the paper will roll to front or back; please confirm the paper must move straightly during the distance that you want to cut. Adjust the speed and pressure, and then you can output the data to the plotter. Quality report:
![]() Ships to United States
Ships to United States
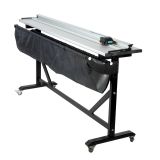
60Inch Aluminum Alloy Large Format Paper Trimmer Cutter with Support Stand
Item Code: CS-M-002
• Its material is aluminum alloy with metal stand. • It is designed with automatically paper-fixing function. • The scale includes both centimeter and inch. • It has material waste catcher. • Stand unit contains locking wheel feature. • The cutter is very sharp. • Aluminum alloys have a strong resistance to corrosion. • It can avoid the move of paper fixed conveniently and efficiently • It can make cutting more accurate. • Material waste catcher to keep your shop clean. • Locking wheels for easy mobility. • There are no rough edges on finished products. This paper cutter not only applies to paper (thickness within 1mm) but also outdoor printing materials, such as KT board, PVC foam board, KAPA board (thickness within 8mm), etc. M SERIES (CONTAINS STAND) Blade head: Working table: Measurement ruler: Side of working table: Support stand: Stands: Final Package - 2pcs of carton case:
![]() Ships to United States
Ships to United States
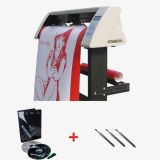
40" Redsail Vinyl Sign Cutter with Contour Cut Function
Item Code: CPM-RS-1120C
Red optic sensor, register marks with "Cut" Support, cut plug-in for Corel DRAW. With such a fast, accurate and versatile vinyl cutter plotter, you can contour cut most any media pre - printed - from your choice of inkjet, solvent based and laser printer. WinPCSign plotting software (Match training CD) Support CorelDraw output directly (But you need to buy a soft dog) This vinyl cutting plotter has a contour cutting function and is used to cut all kinds of pictures, letters, and similar materials on self-adhesive vinyl, sticker. It is made in China and comes with one year warranty. Features • Low cost and high performance machine for the manufacture of signaling. • Controlled by RISC high-speed processor, a high speed cache. • Unique soft impact cutter for smooth cutting. • This cutting plotter adopts the latest numerical technology, which creates a new concept of cutting. • It can regulate the pressure and speed numerically at real-time, which is very convenient and can be achieved fast. • It has a perfect output: there's no saw tooth even when using high speed. • It supports CorelDraw files, bringing great convenience to work. • The cutting plotter is highly stable and has nearly no malfunctions. • It has a stylish design and very solid support. It doesn't shake while cutting. • The cutting plotter has LCD with a very accurate and simple English Menu, operated it by pressing buttons. • The plotter’s pinch rollers are adjustable, so the paper stays in place when using rolls of media. 1.Protection of track 2.Carriage 3.Pinch roller 4.LCD monitor 5.Keyboard panel 6.LED lamp 7.Right shell 8.Machine’s foot 9.Blade holder 10.Seat of blade holder 11.Left shell 12.Handle to control the roller 13.AC power port 14.Safe fuse 15.Power switch 16.RS232 port Locknut holder's shell close screw blade On the working state, the knife can rotate in holder very smoothly. In the first time you can screw the "close screw" off the "holder's shell", set the blade into bottom of holder, then close the "close screw" to avoid the knife falling out, let the knife peep out of the holder less than 0.5mm. When you want to change the blade, take out the old blade, change a new one, then close the" close screw", keep the blade peep out of the holder less than 0.5mm. (The locknut will not screw, usually). Close screw Holder shell Plotting pen. You can use usual ball pen as plotting pen; keep the ball pen peep out of the holder between 4mm and 5mm. the other using method is similar as blade's process; please try it yourself according to the blade's changing method. The structure of floor stand Details Pictures (Remark: The hop-pocket is optional accessory) Double spring press paper holder, not distortion Silica gel pinch roller, durable in use LCD display control panel CE mark and power supply USB interface The life of Blade The correct usage could prolong the life of blade. (1)The more length the blade sharp extends out, the shorter life blade will work. So you should avoid cut through the paper. (2)The more Force, the blade life will get short. (3)Trying to use small Force, when the blade edge is getting less sharp, you could add the working force suitable. (4)Different brand blades will have different life. (5)You should change the blade when you find the old one has no tartness, to avoid affecting the work badly. How to fix and setup the blade? Turn off the plotter power. Set the holder on holder's seat; close the screw of seat of holder. Turn on the power, the carriage will move to right side; you can press "TEST" key to examine the plotter. Remark: A. You should keep the blade clean and don’t break the blade sharp. B. The length out of the cover should be just a little bit, say 0.2mm around over the paper thickness which you will cut! On the working state, the knife can rotate in holder very smoothly. In the first time you can screw the "close screw" off the "holder's shell", set the blade into bottom of holder, then close the "close screw" to avoid the knife falling out, let the knife peep out of the holder less than 0.5mm. When you want to change the blade, take out the old blade, change a new one, then close the" close screw", keep the blade peep out of the holder less than 0.5mm. (The locknut will not screw, usually). How to load media? Steps: Load media / Load paper: When you move the roller, you must lift the handle first; the right roller will not move, usually. Lift the handle, the roller will lift 1 - 2mm, and then you can load your media. Laying down the handle, you can press "UP" key (S+) or "DOWN" key (S-) continuously, the paper will roll to front or back; please confirm the paper must move straightly during the distance that you want to cut. Adjust the speed and pressure, and then you can output the data to the plotter. Common Cutting Function Contour Cutting Function How to use this vinyl cutter to make personal T-shirts, sport clothes, uniform clothes, advertising shirts, color flags? How to use this vinyl cutting machine to make contour cutting for heat transfer? This cutting plotter is great for business usage; it is able to make any kind of design and it works faster and easier than other models. This machine can be used for stickers, glass decal, penaflex, vinyl decal, masking film for painting or etching, vinyl lettering, decorative scrapbook papers, card stock, stencils, magnetic sheets, etc. As well as all kinds of flexible heat transfer media like T-shirts, magic cut colored paper for garments, etc. Quality report:
![]() Ships to United States
Ships to United States
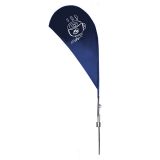
8.2 ft Teardrop Banner with Spike Base (Single Sided Printing)
Item Code: SIC-FB-ST-1
Easy 4 Steps to Custom Made Your flag banner stand: Note:Please exactly follow our artwork requirement in "PDF"tag. Especially all the fonts in the file need to be changed to outlines. Description: These flag banners provide an easy to see advertisement for useing during nearly any event. Each unit comes equipped with a teardrop-shaped banner, which is custom printed using your supplied artwork. This graphic is using CMYK colors, and is ideal for complex designs featuring photographs and gradients. Advertising banners, custom signs, and other beach flags that are digitally printed do not have a minimum order requirement like those that are printed using a silkscreen process. This graphic does not have as high of a color penetration as the silkscreened ones, meaning the back of the display will not have an easily visible reverse image. The beach flags stand on a ground spike. This base option is specifically designed for outdoor use, as the spike can be hammered into the ground. These flag banners can be used to promote on going sales at a retail store, as well as promoting outdoor events and happenings, such as at a tradeshow or convention. These custom printed pennants often feature company names and inspiring messages, and are used during sporting events, such as marathons for a cause. These printed banners can also be used outside of a restaurant with mouth-watering graphics to draw patrons into your establishment.This portable flag stand are not designed to be used in winds exceeding 20 MPH. Graphic file requirement: • CMYK Color Model • Resolution must be 72-125dpi • Convert all fonts to outlines and include all fonts used Product features: • Includes a teardrop flag with full color, CMYK digitally printed graphics. • Carbon composite fiber poles, superb flexibility to prevent breaking. • Ground spike - for use on grass or earth. • Flag pole is lightweight .Simple handling, no tools required. Includes: Spike base, Poles, Single sided graphic printing, Carry bag. Note: Graphic artwork and printing idea are both accepted. It is easy to install banner stand. Firstly, stick the spike into ground and connect the four poles. Secondly, fix the banner on the pole and insert the rope through the hole of banner bottom. Thirdly, use the key snap trigger to lock at the bottom of pole. The last step, put the pole into the spike. SINGLE-SIDED VS DOUBLE-SIDED Our Flags are available in single as well as double sided display: DOUBLE SIDED Two single sided banners are sewn back to back to make a double sided display. A block-out material is sewn between two banners to prevent light from shining through. SINGLE SIDED Image is printed on one side of the banner for single sided display. The back side shows up to 95% mirror on reverse image of the front side.
![]() Ships to United States
Ships to United States
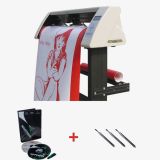
28" Redsail Vinyl Cutter Plotter with Contour Cut Function
Item Code: CPM-RS-800C
Red optic sensor, register marks with "Cut" Support, cut plug-in for Corel DRAW. With such a fast, accurate and versatile vinyl cutter plotter, you can contour cut most any media pre - printed - from your choice of inkjet, solvent based and laser printer. WinPCSign plotting software (Match training CD) Support CorelDraw output directly (But you need to buy a soft dog) This vinyl cutting plotter has a contour cutting function and is used to cut all kinds of pictures, letters, and similar materials on self-adhesive vinyl, sticker. It is made in China and comes with one year warranty. Features • Low cost and high performance machine for the manufacture of signaling. • Controlled by RISC high-speed processor, a high speed cache. • Unique soft impact cutter for smooth cutting. • This cutting plotter adopts the latest numerical technology, which creates a new concept of cutting. • It can regulate the pressure and speed numerically at real-time, which is very convenient and can be achieved fast. • It has a perfect output: there's no saw tooth even when using high speed. • It supports CorelDraw files, bringing great convenience to work. • The cutting plotter is highly stable and has nearly no malfunctions. • It has a stylish design and very solid support. It doesn't shake while cutting. • The cutting plotter has LCD with a very accurate and simple English Menu, operated it by pressing buttons. • The plotter’s pinch rollers are adjustable, so the paper stays in place when using rolls of media. 1.Protection of track 2.Carriage 3.Pinch roller 4.LCD monitor 5.Keyboard panel 6.LED lamp 7.Right shell 8.Machine’s foot 9. Blade holder 10. Seat of blade holder 11.Left shell 12.Handle to control the roller 13.AC power port 14.Safe fuse 15.Power switch 16.RS232 port Locknut holder's shell close screw blade On the working state, the knife can rotate in holder very smoothly. In the first time you can screw the "close screw" off the "holder's shell", set the blade into bottom of holder, then close the "close screw" to avoid the knife falling out, let the knife peep out of the holder less than 0.5mm. When you want to change the blade, take out the old blade, change a new one, then close the" close screw", keep the blade peep out of the holder less than 0.5mm. (The locknut will not screw, usually). Close screw Holder shell Plotting pen. You can use usual ball pen as plotting pen; keep the ball pen peep out of the holder between 4mm and 5mm. the other using method is similar as blade's process; please try it yourself according to the blade's changing method. The structure of floor stand Details Pictures (Remark: The hop-pocket is optional accessory) Double spring press paper holder, not distortion Silica gel pinch roller, durable in use LCD display control panel CE mark and power supply USB interface The life of Blade The correct usage could prolong the life of blade. (1)The more length the blade sharp extends out, the shorter life blade will work. So you should avoid cut through the paper. (2)The more Force, the blade life will get short. (3)Trying to use small Force, when the blade edge is getting less sharp, you could add the working force suitable. (4)Different brand blades will have different life. (5)You should change the blade when you find the old one has no tartness, to avoid affecting the work badly. How to fix and setup the blade? Turn off the plotter power. Set the holder on holder's seat; close the screw of seat of holder. Turn on the power, the carriage will move to right side; you can press "TEST" key to examine the plotter. Remark: A. You should keep the blade clean and don’t break the blade sharp. B. The length out of the cover should be just a little bit, say 0.2mm around over the paper thickness which you will cut! On the working state, the knife can rotate in holder very smoothly. In the first time you can screw the "close screw" off the "holder's shell", set the blade into bottom of holder, then close the "close screw" to avoid the knife falling out, let the knife peep out of the holder less than 0.5mm. When you want to change the blade, take out the old blade, change a new one, then close the" close screw", keep the blade peep out of the holder less than 0.5mm. (The locknut will not screw, usually). How to load media? Steps: Load media / Load paper: When you move the roller, you must lift the handle first; the right roller will not move, usually. Lift the handle, the roller will lift 1 - 2mm, and then you can load your media. Laying down the handle, you can press "UP" key (S+) or "DOWN" key (S-) continuously, the paper will roll to front or back; please confirm the paper must move straightly during the distance that you want to cut. Adjust the speed and pressure, and then you can output the data to the plotter. Common Cutting Function Contour Cutting Function How to use this vinyl cutter to make personal T-shirts, sport clothes, uniform clothes, advertising shirts, color flags? How to use this vinyl cutting machine to make contour cutting for heat transfer? This cutting plotter is great for business usage; it is able to make any kind of design and it works faster and easier than other models. This machine can be used for stickers, glass decal, penaflex, vinyl decal, masking film for painting or etching, vinyl lettering, decorative scrapbook papers, card stock, stencils, magnetic sheets, etc. As well as all kinds of flexible heat transfer media like T-shirts, magic cut colored paper for garments, etc. Quality report:
![]() Ships to United States
Ships to United States
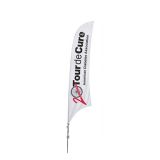
13.1 ft Feather Banner with Spike Base (Single Sided Printing)
Item Code: SIC-FB-SF-3
Easy 4 Steps to Custom Made Your flag banner stand: Note:Please exactly follow our artwork requirement in "PDF"tag. Especially all the fonts in the file need to be changed to outlines. Description: This feather banner is a flag that has a ground spike base for posting in the front lawn of a property. The flag that flutters in the wind is not only easier for people to see than a traditional sign, but also the carefully engineered design is inexpensive by comparison. A pole consisting of four segments, 2 aluminum and 2 fiberglass, comes with each feather banner. An intuitive design and light weight means only one person is needed to set up this display. Graphic file requirement: • CMYK Color Model • Resolution must be 72-125dpi • Convert all fonts to outlines and include all fonts used Product features: • Includes a full color feather flag, CMYK digitally printed graphics. • Carbon composite fiber poles, superb flexibility to prevent breaking. • Ground spike – for its use on grass or earth. • Light weighted flagpole. Simple handling, no tools required. Includes: Spike base, Poles, Double sided graphic printing, Carry bag. Note: Graphic artwork and printing idea are both accepted. It is easy to install banner stand. Firstly, stick the spike into ground and connect the four poles. Secondly, fix the banner on the pole and insert the rope through the hole of banner bottom. Thirdly, use the key snap trigger to lock at the bottom of pole. The last step, put the pole into the spike. SINGLE-SIDED VS DOUBLE-SIDED Our Flags are available in single as well as double sided display: DOUBLE SIDED Two single sided banners are sewn back to back to make a double sided display. A block-out material is sewn between two banners to prevent light from shining through. SINGLE SIDED Image is printed on one side of the banner for single sided display. The back side shows up to 95% mirror on reverse image of the front side.
![]() Ships to United States
Ships to United States
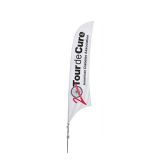
9.8 ft Feather Banner with Spike Base (Single Sided Printing)
Item Code: SIC-FB-SF-1
Easy 4 Steps to Custom Made Your flag banner stand: Note: Please exactly follow our artwork requirement in "PDF"tag. Especially all the fonts in the file need to be changed to outlines. Description: A feather banner, or flying flag, is a very effective way of bringing more attention to your business. Our feather banners are made up of 2 aluminium poles and 2 carbon poles that fit inside into `the` hem of a full-color digitally printed polyester weave banner, which stands upright on the steel base. This portable flag stand is not designed to be used with winds exceeding 20 MPH. Graphic file requirement: • CMYK Color Model • Resolution must be 72-125dpi • Convert all fonts to outlines and include all fonts used Product features: • Includes a full color feather flag, CMYK digitally printed graphics. • Carbon composite fiber poles, superb flexibility to prevent breaking. • Ground spike – for its use on grass or earth. • Light weighted flagpole. Simple handling, no tools required. Includes: Spike base, Poles, Single sided graphic printing, Carry bag. Note: Graphic artwork and printing idea are both accepted. It is easy to install banner stand. Firstly, stick the spike into ground and connect the four poles. Secondly, fix the banner on the pole and insert the rope through the hole of banner bottom. Thirdly, use the key snap trigger to lock at the bottom of pole. The last step, put the pole into the spike. SINGLE-SIDED VS DOUBLE-SIDED Our Flags are available in single as well as double sided display: DOUBLE SIDED Two single sided banners are sewn back to back to make a double sided display. A block-out material is sewn between two banners to prevent light from shining through. SINGLE SIDED Image is printed on one side of the banner for single sided display. The back side shows up to 95% mirror on reverse image of the front side.
![]() Ships to United States
Ships to United States
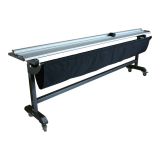
100 Inch Large Format Paper Trimmer Cutter with Support Stand
Item Code: CS-M-004
This paper cutter not only applies to paper(thickness within 1mm) but also outdoor printing materials, such as KT board, PVC foam board, KAPA board(thickness within 8mm), etc. Its breadth is 100 inch and board dimension is 2680mm x 330mm (106" x 13"). Its material is aluminum alloy with stand. This kind of paper cutter is all designed with automatically paper-fixing function. The scale indicating both centimeter and inch makes it more accurate more convenient more efficient and more applicable, avoiding the move of paper fixed. There are no rough edges on finished products, which is superior to other normal products with this regards. Remark: M SERIES (CONTAINS STAND) Blade head: Working table: Measurement ruler: Side of working table: Support stand: Stands: Final package -1 pc of wood case: Package for cutter: Package for stand: Package:
![]() Ships to United States
Ships to United States
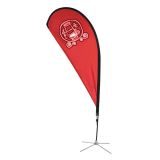
8.2 ft Teardrop Banner with Cross Base
Item Code: SIC-FB-CT-1
Easy 4 Steps to Custom Made Your flag banner stand: Note:Please exactly follow our artwork requirement in "PDF"tag. Especially all the fonts in the file need to be changed to outlines. Description: A teardrop banner, or banner flag, is the perfect tool if you're looking to increase the visibility of your business without breaking the bank. The large, full-color surface of a portable flag or branding banner creates movement that attracts the eyes of customers and gets your marketing message across. For the price you pay, we believe that they are one of the best "bang for your buck" advertising and signage solutions. This portable flag stand are not designed to be used in winds exceeding 20 MPH. Graphic file requirement: • CMYK Color Model • Resolution must be 72-125dpi • Convert all fonts to outlines and include all fonts used Product features: • Includes a teardrop flag with full color, CMYK digitally printed graphics. • Carbon composite fiber poles, superb flexibility to prevent breaking. • Rotating Cross Base - For use on concrete or hard floors. • Flagpole is lightweight .Simple handling, no tools required. Includes: Cross base, Poles, Single sided graphic printing, Carry bag. Note: Graphic artwork and printing idea are both accepted. It is easy to install banner stand, first open the cross base, and connect the four poles, then fix up the banner on the pole and insert the rope through the hole at the banner bottom. Use the key snap trigger to lock it at bottom of pole and insert the pole into the base. SINGLE-SIDED VS DOUBLE-SIDED Our Flags are available in single as well as double sided display: DOUBLE SIDED Two single sided banners are sewn back to back to make a double sided display. A block-out material is sewn between two banners to prevent light from shining through. SINGLE SIDED Image is printed on one side of the banner for single sided display. The back side shows up to 95% mirror on reverse image of the front side.
![]() Ships to United States
Ships to United States
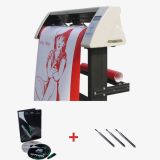
60" Redsail Vinyl Cutter Plotter with Contour Cut Function
Item Code: CPM-RS-1600C
Red optic sensor, register marks with "Cut" Support, cut plug-in for Corel DRAW. With such a fast, accurate and versatile vinyl cutter plotter, you can contour cut most any media pre - printed - from your choice of inkjet, solvent based and laser printer. WinPCSign plotting software (Match training CD) Support CorelDraw output directly (But you need to buy a soft dog), please choose CutMate2.3 CorelDraw driver with softdog This 60" vinyl cutting plotter has a contour cutting function and is used to cut all kinds of pictures, letters, and similar materials on self-adhesive vinyl, sticker. It is made in China and comes with two years warranty.Please choose contour cut function, WinPCSign 2009 Basic Plotting Software. • Low cost and high performance machine for the manufacture of signaling. • Controlled by RISC high-speed processor, a high speed cache. • This 60" vinyl cutting plotter can regulate the pressure and speed numerically at real-time. • This 60" vinyl cutting plotter supports CorelDraw files, bringing great convenience to work. • The cutting plotter is highly stable and has nearly no malfunctions. • This 60" vinyl cutting plotter has a stylish design and very solid support. • The cutting plotter has LCD with a very accurate and simple English Menu, operated it by pressing buttons. • The plotter’s pinch rollers are adjustable. • Unique soft impact cutter • This cutting plotter adopts the latest numerical technology, which creates a new concept of cutting. • This 60" vinyl cutting plotter has a perfect output: there's no saw tooth even when using high speed. • This 60" vinyl cutting plotter doesn't shake while cutting. • The paper stays in place when using rolls of media. • Save money for you. • Smooth cutting • It is very convenient and can be achieved fast. • The cutting plotter is easy to operate. 1.Protection of track 2.Carriage 3.Pinch roller 4.LCD monitor 5.Keyboard panel 6.LED lamp 7.Right shell 8.Machine’s foot 9.Blade holder 10.Seat of blade holder 11.Left shell 12.Handle to control the roller 13.AC power port 14.Safe fuse 15.Power switch 16.RS232 port Locknut holder's shell close screw blade On the working state, the knife can rotate in holder very smoothly. In the first time you can screw the "close screw" off the "holder's shell", set the blade into bottom of holder, then close the "close screw" to avoid the knife falling out, let the knife peep out of the holder less than 0.5mm. When you want to change the blade, take out the old blade, change a new one, then close the" close screw", keep the blade peep out of the holder less than 0.5mm. (The locknut will not screw, usually). Close screw Holder shell Plotting pen. You can use usual ball pen as plotting pen; keep the ball pen peep out of the holder between 4mm and 5mm. the other using method is similar as blade's process; please try it yourself according to the blade's changing method. Double spring press paper holder, not distortion Silica gel pinch roller, durable in use LCD display control panel CE mark and power supply USB interface 1.Details Show: 2.Function Show: The life of cutting knife Blade of vinyl cutter The correct usage could prolong the life of blade. (1)The more length the blade sharp extends out, the shorter life blade will work. So you should avoid cut through the paper.(2)The more Force, the blade life will get short. (3)Trying to use small Force, when the blade edge is getting less sharp, you could add the working force suitable. (4)Different brand blades will have different life. (5)You should change the blade when you find the old one has no tartness, to avoid affecting the work badly. How to fix and setup the cutting knife Blade of vinyl cutter? Turn off the plotter power. Set the holder on holder's seat; close the screw of seat of holder. Turn on the power, the carriage will move to right side; you can press "TEST" key to examine the plotter. Remark: A. You should keep the blade clean and don’t break the blade sharp. B. The length out of the cover should be just a little bit, say 0.2mm around over the paper thickness which you will cut! On the working state, the knife can rotate in holder very smoothly. In the first time you can screw the "close screw" off the "holder's shell", set the blade into bottom of holder, then close the "close screw" to avoid the knife falling out, let the knife peep out of the holder less than 0.5mm. When you want to change the blade, take out the old blade, change a new one, then close the" close screw", keep the blade peep out of the holder less than 0.5mm. (The locknut will not screw, usually). How to load media? Steps: Load media / Load paper: When you move the roller, you must lift the handle first; the right roller will not move, usually. Lift the handle, the roller will lift 1 - 2mm, and then you can load your media. Laying down the handle, you can press "UP" key (S+) or "DOWN" key (S-) continuously, the paper will roll to front or back; please confirm the paper must move straightly during the distance that you want to cut. Adjust the speed and pressure, and then you can output the data to the plotter. The structure of floor stand: Details Pictures (Remark: The hop-pocket is optional accessory) Common Cutting Function Contour Cutting Function How to use this vinyl cutter to make personal T-shirts, sport clothes, uniform clothes, advertising shirts, color flags? How to use this vinyl cutting machine to make contour cutting for heat transfer? This cutting plotter is great for business usage; it is able to make any kind of design and it works faster and easier than other models. This machine can be used for Advertising production, Wall stickers, Post, Retro-reflective sheeting, Adhesive, Heat transfer film, Mobile phone sticker, CAD diagram, Dust cloth, banners, Display Board, Light box, stickers, glass decal, penaflex, vinyl decal, masking film for painting or etching, vinyl lettering, decorative scrapbook papers, card stock, stencils, magnetic sheets, etc. As well as all kinds of flexible heat transfer media like T-shirts, magic cut colored paper for garments, etc. Quality report:
![]() Ships to United States
Ships to United States
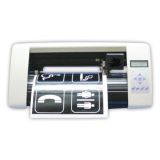
14" Redsail Mini Desktop Vinyl Cutter Plotter with Contour Cut Function
Item Code: CPM-RS-450C
Red optic sensor, register marks with "Cut" Support, cut plug-in for Corel DRAW. Red optic sensor, register marks with "Cut" Support, cut plug-in for Corel DRAW. Aluminum alloy knurling feed rollers, leading shaft, high torque motor and micro-step driver locating system. With such a fast, accurate and versatile desktop cutting plotter, you can contour cut most any media pre-printed - from your choice of inkjet, solvent based and laser printer. WinPCSign plotting software (Match training CD) Support CorelDraw output directly (But you need to buy a soft dog) Features: - Low cost and high performance machine for the manufacture of signaling. - Controlled by RISC high - speed processor, a high speed cache. - Unique soft impact cutter for smooth cutting. - It can regulate the pressure and speed numerically at real-time, which is very convenient and can be achieved fast. - It has a perfect output: There’s no saw tooth even when using high speed. - It supports direct cut-outs from `CorelDraw` 11, 12, X3.X4, X5, bringing great convenience to work. - It has a stylish design and very solid support. It doesn't shake while cutting. - The cutting plotter has LCD with a very accurate and simple English Menu, operated it by pressing buttons. - The plotter’s pinch rollers are adjustable, so the paper stays in place when using rolls of media. Components: 1. Protection of track 9. Knife holder 2. Carriage 10. Seat of knife holder 3. Pinch roller 11. Left shell 4. LCD monitor 12. Handle to control the roller 5. Keyboard panel 13. AC power port 6. LED lamp 14. Safe fuse 7. Right shell 15. Power switch 8. Machine’s foot 16. RS232 port Locknut holder's shell close screw blade On the working state, the knife can rotate in holder very smoothly. In the first time you can screw the "close screw" off the "holder's shell", set the blade into bottom of holder, then close the "close screw" to avoid the knife falling out, let the knife peep out of the holder less than 0.5mm. When you want to change the blade, take out the old blade, change a new one, then close the" close screw", keep the blade peep out of the holder less than 0.5mm. (The locknut will not screw, usually). Close screw Holder shell Plotting pen. You can use usual ball pen as plotting pen; keep the ball pen peep out of the holder between 4mm and 5mm. the other using method is similar as blade's process; please try it yourself according to the blade's changing method. Details Pictures: Silica gel pinch roller, durable in use USB interface Double spring press paper holder, not distortion CE mark and power supply This cutting plotter is great for business usage; it is able to make any kind of design and it works faster and easier than other models. This machine can be used for stickers, glass decal, penaflex, vinyl decal, masking film for painting or etching, vinyl lettering, decorative scrapbook papers, card stock, stencils, magnetic sheets, etc. As well as all kinds of flexible heat transfer media like T - shirts, magic cut colored paper for garments, etc. Blade holder and pen holder The life of Blade: The correct usage could prolong the life of blade. (1) The more length the blade sharp extends out, the shorter life blade will work. So you should avoid cut through the paper. (2) The more Force, the blade life will get short. (3) Trying to use small Force, when the blade edge is getting less sharp, you could add the working force suitable. (4) Different brand blades will have different life. (5) You should change the blade when you find the old one has no tartness, to avoid affecting the work badly. How to fix and setup the blade? Turn off the plotter power. Set the holder on holder's seat; close the screw of seat of holder. Turn on the power, the carriage will move to right side; you can press "TEST" key to examine the plotter. Remark: A. You should keep the blade clean and don’t break the blade sharp. B. The length out of the cover should be just a little bit, say 0.2mm around over the paper thickness which you will cut! On the working state, the knife can rotate in holder very smoothly. In the first time you can screw the "close screw" off the "holder's shell", set the blade into bottom of holder, then close the "close screw" to avoid the knife falling out, let the knife peep out of the holder less than 0.5mm. When you want to change the blade, take out the old blade, change a new one, then close the" close screw", keep the blade peep out of the holder less than 0.5mm. (The locknut will not screw, usually). How to load media? Steps: Load media / Load paper: When you move the roller, you must lift the handle first; the right roller will not move, usually. Lift the handle, the roller will lift 1 - 2mm, and then you can load your media. Laying down the handle, you can press "UP" key (S+) or "DOWN" key (S-) continuously, the paper will roll to front or back; please confirm the paper must move straightly during the distance that you want to cut. Adjust the speed and pressure, and then you can output the data to the plotter. Quality report:
![]() Ships to United States
Ships to United States
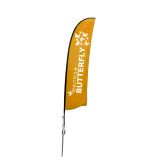
13.1ft Wing Banner with Spike Base (Single Sided Printing)
Item Code: SIC-FB-SWING-3
Easy 4 Steps to Custom Made Your flag banner stand: Note:Please exactly follow our artwork requirement in "PDF"tag. Especially all the fonts in the file need to be changed to outlines. Description: Wing Banners are great for indoor and outdoor use and are available in a range of sizes. The innovative rotating mechanism allows them to ‘feather’ out the wind and they are effective individually or in a cluster. Our wing banners are made up of 2 piece aluminum pole and 2 piece carbon pole that inside into `the` hem of a digitally printed and a full-color polyester weave banner that stands upright on the steel base. This portable flag stand are not designed to be used in winds exceeding 20 MPH. Graphic file requirement: • CMYK Color Model • Resolution must be 72-125dpi • Convert all fonts to outlines and include all fonts used Product features: • Includes a wing flag with full color, CMYK digitally printed graphics. • Carbon composite fiber poles, superb flexibility to prevent breaking. • Ground spike - for use on grass or earth. • Flagpole is lightweight .Simple handling, no tools required. Includes: Spike base, Poles, Single sided graphic printing, Carry bag. Note: Graphic artwork and printing idea are both accepted. It is easy to install banner stand. Firstly, stick the spike into ground and connect the four poles. Secondly, fix the banner on the pole and insert the rope through the hole of banner bottom. Thirdly, use the key snap trigger to lock at the bottom of pole. The last step, put the pole into the spike. SINGLE-SIDED VS DOUBLE-SIDED Our Flags are available in single as well as double sided display: DOUBLE SIDED Two single sided banners are sewn back to back to make a double sided display. A block-out material is sewn between two banners to prevent light from shining through. SINGLE SIDED Image is printed on one side of the banner for single sided display. The back side shows up to 95% mirror on reverse image of the front side.
![]() Ships to United States
Ships to United States
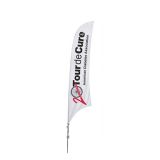
11.5 ft Feather Banner with Spike Base (Single Sided Printing)
Item Code: SIC-FB-SF-2
Easy 4 Steps to Custom Made Your flag banner stand: Note:Please exactly follow our artwork requirement in "PDF"tag. Especially all the fonts in the file need to be changed to outlines. Description: A feather banner, or flying flag, is a very effective way of bringing more attention to your business. Our feather banners are made up of 2 aluminium poles and 2 carbon poles that fit inside the hem of and a full-color digitally printed polyester weave banner that stands upright on the steel base. This portable flag stand is not designed to be used in winds exceeding 20 MPH. Graphic file requirement: • CMYK Color Model • Resolution must be 72-125dpi • Convert all fonts to outlines and include all fonts used Product features: • Includes a full color feather flag, CMYK digitally printed graphics. • Carbon composite fiber poles, superb flexibility to prevent breaking. • Ground spike – for its use on grass or earth. • Light weighted flagpole. Simple handling, no tools required. Includes: Spike base, Poles, Single sided graphic printing, Carry bag. Note: Graphic artwork and printing idea are both accepted. It is easy to install banner stand. Firstly, stick the spike into ground and connect the four poles. Secondly, fix the banner on the pole and insert the rope through the hole of banner bottom. Thirdly, use the key snap trigger to lock at the bottom of pole. The last step, put the pole into the spike. SINGLE-SIDED VS DOUBLE-SIDED Our Flags are available in single as well as double sided display: DOUBLE SIDED Two single sided banners are sewn back to back to make a double sided display. A block-out material is sewn between two banners to prevent light from shining through. SINGLE SIDED Image is printed on one side of the banner for single sided display. The back side shows up to 95% mirror on reverse image of the front side.
![]() Ships to United States
Ships to United States
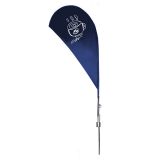
9.8 ft Teardrop Banner with Spike Base (Single Sided Printing)
Item Code: SIC-FB-ST-2
Easy 4 Steps to Custom Made Your flag banner stand: Note:Please exactly follow our artwork requirement in "PDF"tag. Especially all the fonts in the file need to be changed to outlines. Description: These flag banners provide an easy to see advertisement for useing during nearly any event. Each unit comes equipped with a teardrop-shaped banner, which is custom printed using your supplied artwork. This graphic is using CMYK colors, and is ideal for complex designs featuring photographs and gradients. Advertising banners, custom signs, and other beach flags that are digitally printed do not have a minimum order requirement like those that are printed using a silkscreen process. This graphic does not have as high of a color penetration as the silkscreened ones, meaning the back of the display will not have an easily visible reverse image. The beach flags stand on a ground spike. This base option is specifically designed for outdoor use, as the spike can be hammered into the ground. These flag banners can be used to promote on going sales at a retail store, as well as promoting outdoor events and happenings, such as at a tradeshow or convention. These custom printed pennants often feature company names and inspiring messages, and are used during sporting events, such as marathons for a cause. These printed banners can also be used outside of a restaurant with mouth-watering graphics to draw patrons into your establishment.This portable flag stand are not designed to be used in winds exceeding 20 MPH. Graphic file requirement: • CMYK Color Model • Resolution must be 72-125dpi • Convert all fonts to outlines and include all fonts used Product features: • Includes a teardrop flag with full color, CMYK digitally printed graphics. • Carbon composite fiber poles, superb flexibility to prevent breaking. • Ground spike - for use on grass or earth. • Flagpole is lightweight .Simple handling, no tools required. Includes: Spike base, Poles, Single sided graphic printing, Carry bag. Note: Graphic artwork and printing idea are both accepted. It is easy to install banner stand. Firstly, stick the spike into ground and connect the four poles. Secondly, fix the banner on the pole and insert the rope through the hole of banner bottom. Thirdly, use the key snap trigger to lock at the bottom of pole. The last step, put the pole into the spike. SINGLE-SIDED VS DOUBLE-SIDED Our Flags are available in single as well as double sided display: DOUBLE SIDED Two single sided banners are sewn back to back to make a double sided display. A block-out material is sewn between two banners to prevent light from shining through. SINGLE SIDED Image is printed on one side of the banner for single sided display. The back side shows up to 95% mirror on reverse image of the front side.
![]() Ships to United States
Ships to United States
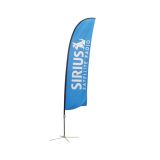
13.1 ft Wing Banner with Cross Base (Single Sided Printing)
Item Code: SIC-FB-CWING-3
Easy 4 Steps to Custom Made Your flag banner stand: Note:Please exactly follow our artwork requirement in "PDF"tag. Especially all the fonts in the file need to be changed to outlines. Description: Wing Banners are great for indoor and outdoor use and are available in a range of sizes. The innovative rotating mechanism allows them to ‘feather’ out the wind and they are effective individually or in a cluster. Our wing banners are made up of 2 piece aluminum pole and 2 piece carbon pole that inside into `the` hem of a digitally printed and a full-color polyester weave banner that stands upright on the steel base. This portable flag stand are not designed to be used in winds exceeding 20 MPH. Graphic file requirement: • CMYK Color Model • Resolution must be 72-125dpi • Convert all fonts to outlines and include all fonts used Product features: • Includes a wing flag with full color, CMYK digitally printed graphics. • Carbon composite fiber poles, superb flexibility to prevent breaking. • Rotating Cross Base - For use on concrete or hard floors. • Flagpole is lightweight .Simple handling, no tools required. Includes: Cross base, Poles, Single sided graphic printing, Carry bag. Note: Graphic artwork and printing idea are both accepted. It is easy to install banner stand, first open the cross base, and connect the four poles, then fix up the banner on the pole and insert the rope through the hole at the banner bottom. Use the key snap trigger to lock it at bottom of pole and insert the pole into the base. SINGLE-SIDED VS DOUBLE-SIDED Our Flags are available in single as well as double sided display: DOUBLE SIDED Two single sided banners are sewn back to back to make a double sided display. A block-out material is sewn between two banners to prevent light from shining through. SINGLE SIDED Image is printed on one side of the banner for single sided display. The back side shows up to 95% mirror on reverse image of the front side.
![]() Ships to United States
Ships to United States
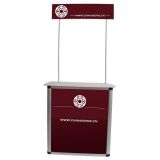
Standard Aluminum Portable Trade Show Counter with Top Board
Item Code: P-SKL11-2
Description: A promotional counter, such as a promotion stand or trade show counter, offers a great reception point at marketing events and exhibits. This demonstration center is made of corrugated plastic with an aluminum frame. This promotional counter features a blank header to attach your own sign or graphics. It take just minutes to setup and require no tools for assembly. Feature: • Aluminum structure. Portable and much more strong. Notice: Price is not including graphic printing It is easy to install banner stand. Firstly, stick the spike it into ground and connect the four poles, then fix the banner on the pole and insert the rope through the hole of banner bottom then use the key snap trigger to lock at the bottom of pole, and the last step, put the pole into the spike. Firstly open the side panel outwards 90º on which the gear teeth couple each other to adjust the degree of angles. Fix the projection of the front panel by the hole of top panel. There are two aluminum poles on which there are connection turnbuckles. Fix the pole to the holes of top panel by tightening the turnbuckles so that the poles will stand on the panel. The header assembly is done by slotting two aluminum poles into the header. Connect the pole header with the poles on the top panel. The installation finished. This promotional counters are ideal for many events, including Trade Shows, Exhibitions and are very popular for Shopping Centre Demonstrations.
![]() Ships to United States
Ships to United States
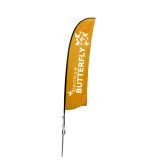
9.8 ft Wing Banner with Spike Base (Single Sided Printing)
Item Code: SIC-FB-SWING-1
Easy 4 Steps to Custom Made Your flag banner stand: Note:Please exactly follow our artwork requirement in "PDF"tag. Especially all the fonts in the file need to be changed to outlines. Description: Wing Banners are great for indoor and outdoor use and are available in a wide range of sizes. The innovative rotating mechanism allows them to ‘feather’ out with the wind and they are effective individually or in a cluster. Our wing banners are made up of 2 aluminium poles and 2 carbon poles that fit inside the hem of a full-color digitally printed polyester weave banner that stands upright on the steel base. This portable flag stand is not designed to be used in winds exceeding 20 MPH. Graphic file requirement: • CMYK Color Model • Resolution must be 72-125dpi • Convert all fonts to outlines and include all fonts used Product features: • Includes a full color wing flag with, CMYK digitally printed graphics. • Carbon composite fiber poles, superb flexibility to prevent breaking. • Ground spike – for its use on grass or earth. • Light weighted flagpole .Simple handling, no tools required. Installation: It is easy to install banner stand. Firstly, stick the spike it into ground and connect the four poles, then fix the banner on the pole and insert the rope through the hole of banner bottom then use the key snap trigger to lock at the bottom of pole, and the last step, put the pole into the spike. Includes: Spike base, Poles, Single sided graphic printing, Carry bag. Note: Graphic artwork and printing idea are both accepted. It is easy to install banner stand. Firstly, stick the spike into ground and connect the four poles. Secondly, fix the banner on the pole and insert the rope through the hole of banner bottom. Thirdly, use the key snap trigger to lock at the bottom of pole. The last step, put the pole into the spike. SINGLE-SIDED VS DOUBLE-SIDED Our Flags are available in single as well as double sided display: DOUBLE SIDED Two single sided banners are sewn back to back to make a double sided display. A block-out material is sewn between two banners to prevent light from shining through. SINGLE SIDED Image is printed on one side of the banner for single sided display. The back side shows up to 95% mirror on reverse image of the front side.
![]() Ships to United States
Ships to United States
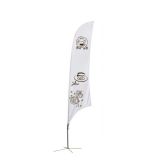
9.8 ft Feather Banner with Cross Base (Single Sided Printing)
Item Code: SIC-FB-CF-1
Easy 4 Steps to Custom Made Your flag banner stand: Note:Please exactly follow our artwork requirement in "PDF"tag. Especially all the fonts in the file need to be changed to outlines. Description: Feather banners/flags are an excellent way to display advertising for your business at trade shows, and events. They can be easily assembled in a few minutes. Our feather banners are made up of 2 piece aluminum poles and 2 piece carbon poles that inside into the hem of a digitally printed and a full-color polyester weave banner that stands upright on the steel base. The Cross Base could be an ideal fit for you in the event you are placing your Feather Flag Banner Stand a flat surface. The Cross Base also enables your flag to spin around the base when there is a breeze. This portable flag stands are not designed to be used in winds exceeding 20 MPH. With double sided printing we print on two pieces of polyester fabric and stitch them together.This offers a readable image from each side of the flag unlike single sided prints. Graphic file requirement: • CMYK Color Model • Resolution must be 72-125dpi • Convert all fonts to outlines and include all fonts used Product features: • Includes a feather flag with full color, CMYK digitally printed graphics. • Carbon composite fiber poles, superb flexibility to prevent breaking. • Rotating Cross Base - For use on concrete or hard floors. • Flagpole is lightweight .Simple handling, no tools required. Note: Graphic artwork and printing idea are both accepted. It is easy to install banner stand, first open the cross base, and connect the four poles, then fix up the banner on the pole and insert the rope through the hole at the banner bottom. Use the key snap trigger to lock it at bottom of pole and insert the pole into the base. SINGLE-SIDED VS DOUBLE-SIDED Our Flags are available in single as well as double sided display: DOUBLE SIDED Two single sided banners are sewn back to back to make a double sided display. A block-out material is sewn between two banners to prevent light from shining through. SINGLE SIDED Image is printed on one side of the banner for single sided display. The back side shows up to 95% mirror on reverse image of the front side.
![]() Ships to United States
Ships to United States
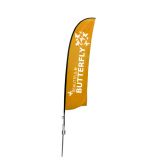
11.5 ft Wing Banner with Spike Base (Single Sided Printing)
Item Code: SIC-FB-SWING-2
Easy 4 Steps to Custom Made Your flag banner stand: Note:Please exactly follow our artwork requirement in "PDF"tag. Especially all the fonts in the file need to be changed to outlines. Description: Wing Banners are great for indoors and outdoors, they are available in a wide range of sizes. The innovative rotating mechanism allows them to ‘feather’ out with the wind and they are effective individually or in a cluster. Our wing banners are made up of 2 aluminum poles and 2 carbon poles that fit inside the hem of a full-color digitally printed polyester weave banner that stands upright on the steel base. This portable flag stand is not designed to be used in winds exceeding 20 MPH. Graphic file requirement: • CMYK Color Model • Resolution must be 72-125dpi • Convert all fonts to outlines and include all fonts used Product features: • Includes a full color wing flag, CMYK digitally printed graphics. • Carbon composite fiber poles, superb flexibility to prevent breaking. • Ground spike – for its use on grass or earth. • Light weighted flagpole, Simple handling, no tools required. Installation: It is easy to install banner stand. Firstly, stick the spike it into ground and connect the four poles, then fix the banner on the pole and insert the rope through the hole of banner bottom then use the key snap trigger to lock at the bottom of pole, and the last step, put the pole into the spike. Includes: Spike base, Poles, Single sided graphic printing, Carry bag. Note: Graphic artwork and printing idea are both accepted. It is easy to install banner stand. Firstly, stick the spike into ground and connect the four poles. Secondly, fix the banner on the pole and insert the rope through the hole of banner bottom. Thirdly, use the key snap trigger to lock at the bottom of pole. The last step, put the pole into the spike. SINGLE-SIDED VS DOUBLE-SIDED Our Flags are available in single as well as double sided display: DOUBLE SIDED Two single sided banners are sewn back to back to make a double sided display. A block-out material is sewn between two banners to prevent light from shining through. SINGLE SIDED Image is printed on one side of the banner for single sided display. The back side shows up to 95% mirror on reverse image of the front side.
![]() Ships to United States
Ships to United States
